Part 2 - Install Yellow Lite on a Raspberry PI
In this tutorial we will use your PI from part one and install Yellow Lite. Yellow Lite will capture images using your DSLR based on a configurable schedule.
Prerequisites
Java and ghoto2 are required to run Yellow Lite. You can install both as a Raspbian packages by typing the following:
sudo apt-get update
sudo apt-get install oracle-java8-jdk gphoto2 -y
Download Yellow Lite
Open a Terminal and run the following commands.

cd ~/Desktop
wget -O yellow-lite-0.9.zip https://avisec.atlassian.net/wiki/download/attachments/10977379/yellow-lite-0.9.zip?api=v2
unzip yellow-lite-0.9.zip
chmod u+x yellow-lite-0.9.jar
rm -f yellow-lite-latest.jar
ln -s yellow-lite-0.9.jar yellow-lite-latest.jar
To update an existing Yellow Lite installation, simply run the commands above with
the latest version number again and then restart the yellow service.
A Yellow Lite installation consists of the following files:
On the Desktop:
/home/pi/Desktop/yellow-lite-latest.jara symlink to the latest version of the executable jar.yellow-lite-0.9.jaran executable jar, contains the executable software.application.propertiesa property file with the configuration.
/etc/systemd/system/yellow.servicethe configuration to start Yellow Lite when the PI is booting.
We’ll create the application and service configuration files in the next two sections.
Configure Yellow Lite
Run sudo leafpad ~/Desktop/application.properties and add the following content:
capture.source=gphoto
capture.folder=images
image.archive=true
Then save the file on your Desktop and close the editor.
Please make sure to restart the yellow service (sudo service yellow restart)
to apply configuration changes. This is not required during the first setup as the service does not exist yet.
Install as service
Open a Terminal and type sudo leafpad /etc/systemd/system/yellow.service. This opens a text editor into which you paste the following content.
[Unit]
Description=yellow
After=syslog.target

[Service]
User=pi
ExecStart=/home/pi/Desktop/yellow-lite-latest.jar
SuccessExitStatus=143

[Install]
WantedBy=multi-user.target
Save the file and close the editor.
Yellow Lite is now registered as a Linux service. To automatically start this service when the PI is booting, run the following command:
sudo systemctl enable yellow.service
Start and stop the service
To start or stop Yellow Lite, you can use the following commands:
sudo service yellow stop
sudo service yellow start
sudo service yellow restart
sudo service yellow status
The last command tells you whether Yellow Lite is running and lists the last entries in the log file. If you want to see more log entries, you can use journalctl.
sudo journalctl -u yellow.service
Use `PgUp`, `PgDn`, `Home`, or `End` to navigate the log and `Ctrl+C` to quit journalctl.
Disable automatic camera mounting
If you are using a Gnome based Linux (Raspbian with Pixel is such a system), your camera’s USB connection might automatically be grabbed by the operating system to allow browsing the camera in the file explorer. This can result in gphoto2 claiming that it “Could not claim the USB device”. The solution to this is to disable this feature by running the following commands:
sudo mv /usr/share/gvfs/mounts/gphoto2.mount /usr/share/gvfs/mounts/unused-gphoto2.mount
sudo mv /usr/share/gvfs/remote-volume-monitors/gphoto2.monitor /usr/share/gvfs/remote-volume-monitors/unused-gphoto2.monitor
sudo mv /usr/lib/gvfs/gvfs-gphoto2-volume-monitor /usr/lib/gvfs/unused-gvfs-gphoto2-volume-monitor
Test your Yellow Lite setup
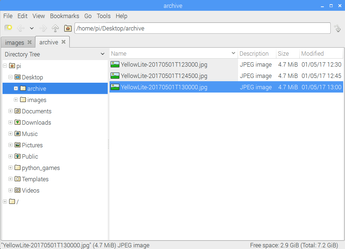
Now you can connect your DSLR to your PI with a USB cable and wait for your images to appear in the `archive` folder. By default Yellow Lite takes an image every 15 minutes from 6 AM to 10 PM.
Should the images not appear, please check the logs.