Part 1 - Install Raspbian on a Raspberry PI
- Michael Gysel (Unlicensed)
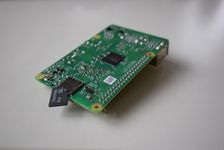
The heart of Yellow Lite is the webcam controller running on the PI, a small single-board computer that is very popular and widely available.
What you need for this part:
- Raspberry PI including a power supply
- Micro SD Card
- Monitor, Mouse and Keyboard

There are several models of the PI available. We recommend using the latest version as it has the best hardware specification. Older models however should work as well.
The SD card will be the only permanent storage the PI has access to as it does not have an internal hard drive. We recommend using an SD card that has at least 8 GB available. If you plan to archive the images on your PI, you should consider buying a larger card.
Download Raspbian
The most popular operating system for the PI is Raspbian, which is a modified version of Debian, a very popular Linux distribution. You can download Raspbian from the PI website. The following tutorial is based on Raspbian Jessie with Pixel. You could also install Raspbian Lite (which comes without a graphical user interface) assuming you are familiar with the Linux Terminal.
Once the download is finished, extract the .img file in the .zip file to your file system.
Copy the Raspbian image to an SD card
The Raspberry PI’s website describes in detail how to copy your .img file to an SD card.
Depending on your operating system, pick one of the following links.
Now you’re ready to insert the SD card into the PI and start it for the first time.
You are ready to proceed with with next step once you see the PI up and running:
Raspberry PI Configuration
As the last step in this tutorial, we are going to apply some basic configuration
changes to our system. To achieve this, you need to open a Terminal window.
- Execute
sudo raspi-configand use your keyboard to navigate the menu items.- Expand Filesystem to make the whole SD card usable.
- Internationalisation Options asks for your Locale (system language, time zone) and your keyboard layout.
- Once you’ve changed what you need, select Finish and reboot your PI.
- The default user on your PI is “pi” with the password “raspberry”. If you operate your PI
in a non-trusted network, we recommend changing this password. Open a Terminal, type passwd, and follow the instructions.