1. Assembly and Cabling
- Daniel Baertschi
Outdoor DSLR Housing
Thank you for choosing avisec’s Outdoor DSLR Housing. Please read the following over-views carefully. They contain important advice about the use, specification and function of your housing.
The DSLR housing comprises two parts. Both are made of high quality opaque polyurethane foam. This material is suitable for permanent outdoor use. The housing is made for all weather conditions and is resistant to natural ultraviole
Commissioning and use
- Insert the pressure compensation membrane and the M20 cable gland and screw it on tightly, before first use.
- If needed, additional equipment can be attached in the housing with polyurethane glue or fixed to the aluminum plate.
- The four M5 screws on the upper shell are suitable for securing additional devices such as a protective roof, solar panels or LED illuminator.
- Check the seals before you close the housing and tighten the screws. Hard objects may damage the polyurethane seals and impact tightness.
Specifications
- Environmental condition: rugged housing for all weather conditions, ultraviolet resistant.
- Operating temperature: -40°C to +60°C.
- Housing bottom shell: material polyurethane opaque colored black with graphite.
- Housing upper shell: covered with polyurethane paint silky gloss RAL 9003.
- Protection glass: highly pure white glass 3mm. The glass is firmly glued to the housing and cannot be replaced. Please contact the manufacturer if replacement is needed.
Tool marks
Both shells of the housing could show airlocks because of the high pressure die-cast production process. They do not have any negative impact on the function or resistance. The black part of the housing is unprocessed and raw. It could contain tool marks especially from the mold-release.
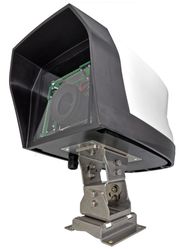
Preparation of camera assembly
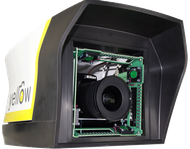
Turn the four thread poles and nuts to assemble the plate with camera and electronics to the desired height. The default height corresponds to the optimal position for the combination of defroster heater and wide-angle lens.
Picture: DSLR housing open with thread poles for aluminum plate
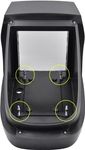
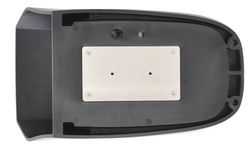
Picture: DSLR housing with Aluminium plate without camera and attachments (scope of supply empty housing)
Pressure compensation membrane and cable gland
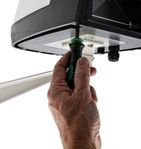
Carefully screw in and tighten the cable gland M20 [1] and the pressure compensation membrane [2] from the outside with a suitable tool. Both glands are responsible for the sealing. Tighten them to make sure that water or insects are not able to enter the housing. The cable gland M20 can be used with conventional patch cables. The cable gland and the pressure compensation membrane are delivered with the housing.
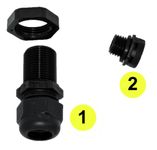

Picture: Assembly of cable gland and pressure compensation membrane
Cabling
LAN-cables category 6A are suitable for cabling up to 100m. Use an ultraviolet resistant cable or a protective tube for outdoor assembly. The camera can be connected with a two-wire cable to a DC power supply. For specifications see “Power supply for photo webcam”.
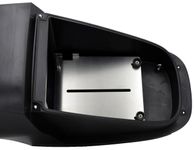
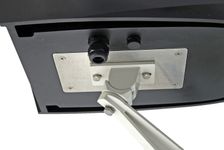
Mounting plate for fixing of different adapters
The mounting plate on the bottom of the housing can be used with different adapters. They are fixed with 2x M5 screws. Caution: use the provided screws only. If the screws are too long they can damage the housing.
Mount of power supply and camera controller
Mount the power supply for the photo webcam with the screws provided. Important: the camera controller has to be insulated with the plastic distance sleeves provided. An electronic contact with the mounting plate causes a short-circuit damaging the electronics.
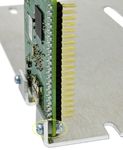
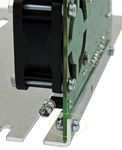
Image: mount of camera controller left with distance sleeves. Power supply for photo webcam can be fixed without distance sleeves.
Tightening of camera
Tighten the camera with inch screw and foam rubber mat on the aluminum plate. The foam rubber mate prevents the camera slipping.
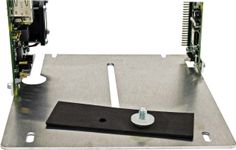
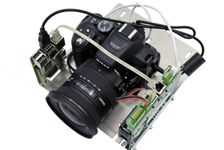
Image: aluminum plate, foam rubber plate and inch screw to fasten the camera
Front glass defroster heater
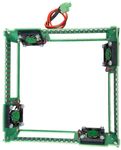
Put the defroster heater into the inside of the frame with the ventilators turned forward. The heater does not have to be secured.

Caution
The heater gets very hot. There is a risk of burning. Do not place flammable objects near or on the defroster.
Fasten the camera
Assemble the camera with the mounting plate and the camera controller in the housing. Please make sure that the two slots in front of the plate are in between the nuts of the thread pole. Tighten the mounting plate with the thumbscrews provided. To prevent the camera from vibrating, please tighten the M5 nuts in the front.
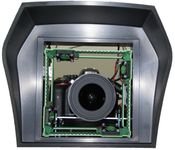
Screw on the camera housing
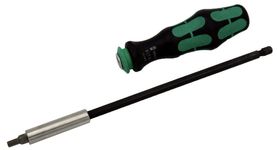
The camera housing can be screwed on watertight with four Allen screws. Before you screw on, please check if the sealing in the covering is intact. For the two front-end Allen screws you need a special tool. You can either use the hex wrench provided or a bit extension of 20cm with a 4mm hexagonal Bit.
Mounting adapter for photo webcam
The housing can be fixed with different adapters. We provide the following adapters for mounting your camera on walls, masts, horizontal surfaces or tubes.
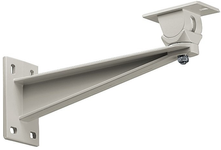
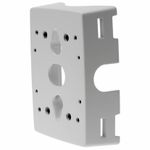
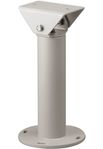
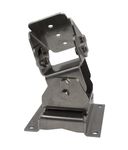

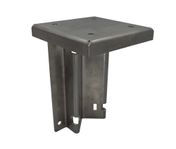
Pictures (from left to right): Wall bracket, mast mount bracket suitable for wall bracket, parapet bracket, kardan adapter, mounting plate suitable for kardan adapter for horizontal mounting on tubes, tube adapter (requires kardan adapter)
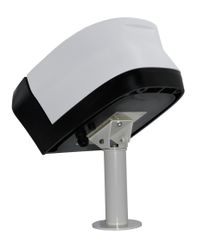
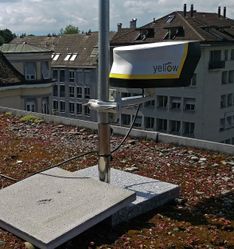
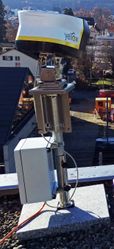
Picture: typical mounting situations
Cleaning front glass
The front glass is made of highly white 3mm strong window glass. For cleaning:
- Remove large particles by washing
- Carefully clean the front glass with a lot of water and a microfiber cloth
- Do not towel it dry.
- If the front glass is extremely dirty, please use window or bathroom cleaner.