/
8. Photo Webcam setup in the field
8. Photo Webcam setup in the field
- Daniel Baertschi
Owned by Daniel Baertschi
Last updated: Mar 17, 2018
The setup of the Photo Webcam is easy. The camera can be set up and installed with the display’s help.
Recommendation
Open the camera housing only if there’s dry weather. Prevent any humidity entering the housing. Water vapor could condense on the front glass on cold days. If required you can put in silica gel dry sacs.
Photo Webcam Aiming
- Align camera mounting approximately and connect with mobile router or Internet.
- Unplug the USB cable (black) at the Raspberry Pi.
- Open camera display
- Set the camera with the mechanical switch to Live View Mode.
- Aim Photo Webcam, zoom and focus objectives.
- When the camera is aimed, plug USB-cable (black) back in the Raspberry Pi.
- Close camera display.
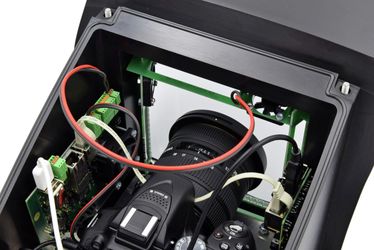
Picture: open camera housing with camera
Photo Webcam Check Remote Control
- Take a picture by portal remote control with “Capture Image”.
- Reload the page with “Refresh".
Depending on the transfer speed, the image appears in the portal after a few seconds. - Focus camera by clicking “Focus”.
- Chose an image area to focus on by clicking on it with the left mouse button and pressing “Set Focus”.
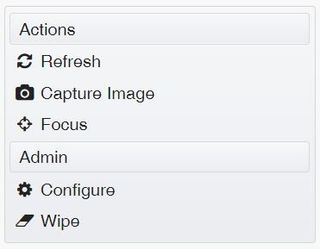
Picture: yellow-portal, Actions Menu
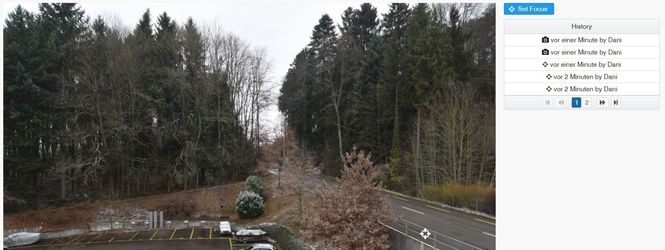
Picture: Focus camera by remote control
, multiple selections available,
Related content
Wie veröffentliche ich eine Webcam auf meiner Webseite?
Wie veröffentliche ich eine Webcam auf meiner Webseite?
More like this
Bmetry Configuration
Bmetry Configuration
More like this
Feed creation and configuration
Feed creation and configuration
More like this
Controller ports
Controller ports
More like this
1. Assembly and Cabling
1. Assembly and Cabling
Read with this